Hey guys! I'm back again to start on Part 2. I'll only have one more post in this series, and it will cover the final element of the perfect Thanksgiving...THE GRAVY.
Here’s the much-awaited turkey recipe! It was much easier to cook a turkey than I thought it would be. There’s really not much to it. I’ll show you step-by-step how to season it, stuff it, and cook it so that you are guaranteed a moist, flavorful end result.
Sorry in advance about the large number of pictures. I tried to take a picture of every step for a couple of reasons: 1) so you could see exactly how I did it and 2) so I can look back next year and every year after that to remind myself how to cook Maw Maw’s Turkey J
O, and in case you missed Part 1, here are the links:
MAW MAW'S THANKSGIVING TURKEY:

First you'll need a turkey.
I bought Butterball because Maw Maw said, "Butterball is the only kind of turkey you should ever buy."J
Mine was only 6.75 lbs.
Mine was NOT frozen, but if you buy one that is, be sure to let it thaw for at least 24 hours in the refrigerator!

Then you'll need apple, celery, and onion to stuff the bird.

And you'll need some chicken stock to help make the gravy and "get the juices going" in the bottom of your pan.
*Note: the only thing that went wrong at my dinner party was the fact that my gravy turned out too salty!! Somehow in that last 15 minutes of cooking, it went from perfectly seasoned to OMG THAT'S SO SALTY!
I did some research and found out that the problem is not all that uncommon. Someone recommended to buy really low sodium chicken broth. When you compare low sodium to low sodium, you'll find that, even though they say the same thing, not all low sodium chicken broths are created equal.
Moving on...

You'll also need some good bacon...the thick stuff.

And salt and pepper for seasoning.
Okay, enough of that. Let's start cooking!!

Start by rinsing each and every crevasse of your bird.

Then remove all of the innards while trying really hard not to gag.

Then pat your turkey dry with some paper towels.

Unwrap the roaster that you bought the day of the party and give it a rinse J
Or if you have one already, pull it out of storage.

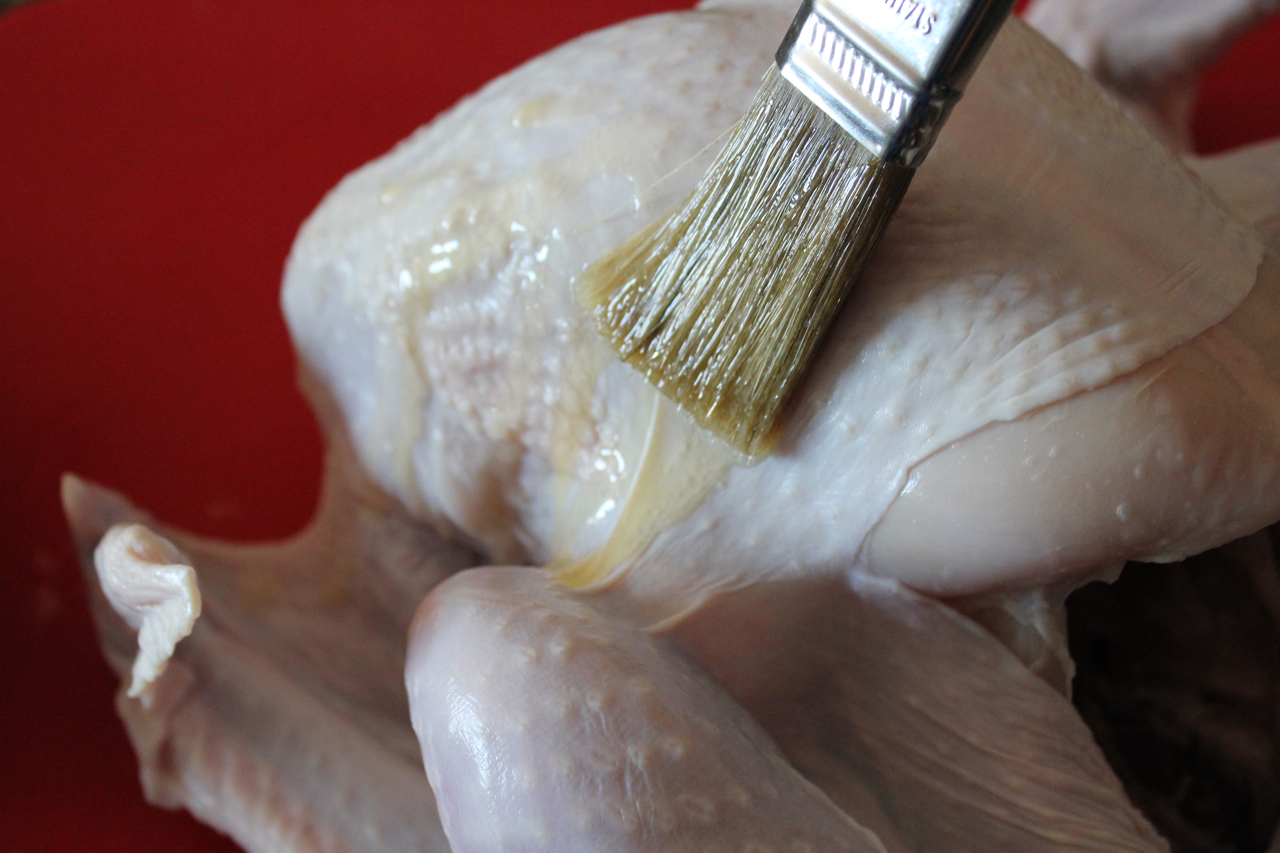
Melt some butter in a microwave-safe bowl and get out your pastry brush.

Then butter every nook and cranny of your roaster.

Especially the rack.

Measure out two cups of LOW LOW SODIUM chicken stock.

And pour it in.

Cut celery into pieces so that they will fit inside the turkey cavity.

And be sure to save the leaves! They are packed with flavor!!

Cut your apple.


Then your onion.

I only used 1/2 onion because that's all that would fit.
Now it's time to get the turkey ready!
Start by buttering the entire thing.

Even inside the cavity...

...and in between the skin and the breast.
Gently work your way under the skin and then butter it.

Season your turkey with salt.


And pepper.

Now start stuffing your bird.


Now that it's all stuffed, we need something to keep all the flavorings inside the turkey.
Go find your kitchen twine.
If you don't have any, have no fear. My turkey came with some in the packaging!

Pull some out.
(You don't need much. I'd say one foot at the most.)

Start by running one end under the two legs.

Then pull both ends towards the center and cross over and wrap the string ends under the legs.

Continue wrapping the string around until you run out.

Then tie it into a knot.

And cut off the excess.

Place the turkey breast-side up in your buttered roasting pan.
The tricky part is getting the wings to fold under the turkey so that they cook evenly.
I'll try my best to show you how...
Start by grabbing the little part of the wing (aren't my descriptions so profound?) J

And tucking it under the turkey.


Like this.
It may take a little working with, but don't worry, you won't break it...
...and if you do, who cares? The turkey is already dead. J
Repeat on the other side.

He's almost ready, but there's one more thing he needs...

Get out your bacon.

And cover every inch of him with it.

Like this.

Then get some heavy duty aluminum foil and cover your roasting pan.
Be sure not to touch the turkey with the foil. Leave some space in between.
Now he's ready to go in the oven!! Look on the packaging your turkey came in to determine how long he needs to cook. Mine was about 3 1/2 hours on 350.

When there are 30-45 minutes left of cooking time, remove the foil and the bacon and pour in 2 MORE CUPS of low sodium chicken broth.
...then give him another coating of butter.
When your turkey has been in the oven the alloted time, insert a meat thermometer in between the thigh and the hip joint to make sure your turkey is around 170 degrees.
If it is, put your turkey on a serving platter and cover it tightly with aluminum foil for at least 30 minutes (or until you're ready to slice it) so that the juices can redistribute throughout the meat and your turkey will remain MOIST AND DELICIOUS!!

Here he is ready to be sliced!!
I did a simple decoration of Italian parsley and fresh cranberries because I had some left over...

I made Pioneer Woman's Homemade Cranberry Sauce. It was utterly delicious and SO EASY!!!
I will most definitely be adding it to my family's traditional Thanksgiving meal. Thanks Ree!!
Well, that's all for today! Come back tomorrow and see the fourth and final post of this Thanksgiving series! You don't wanna miss it...I'm showing you how to make the perfect gravy and posting some pictures from the party J
HAVE A FABULOUS TUESDAY!!!!!
I'LL BE BACK TOMORROW!!
No comments:
Post a Comment